CUSTOMER SUPPORT (305) 909-7241
Arbiter 3.5 Installation
Arbiter 3.5 Elite Install Guides
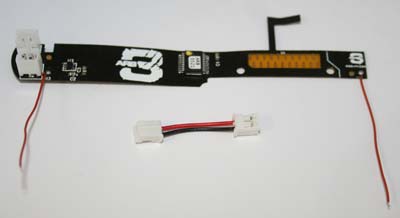
Find below the dedicated installation guides for installing the Modiify Arbiter 3.5 Elite Rapid Fire chips into the Xbox 360 and PS3 controllers, along with the usage videos, digital manuals and help.
Make sure you pick the correct style controller board from the guides below before continuing and read over the entire install procedure before starting. Once finished, double check all connections are identical to the install images including the back wires and paying close attention to the ABX and Y connections as they are all different for each board and not all pins connect.
If you are sure you have done this and still having trouble, watch the videos as they explain how the chip works (as it might be working just differently to how you think it would). If you still have trouble email us at for more help.
XBOX 360 INSTALLATION
The Arbiter 3.5 Elite chips are compatible with all makes of Xbox 360 controller, from the oldest Matrix 1 right through CG1, CG2 to the newest Matrix 2 boards, and even Wired controllers.
NOTE: To solder to the black pads of the ABXY / Back buttons etc... you must first scrape off the carbon using a knife like in the install video.
Find the installation video of the older chip, which is installed in exactly the same fashion as the latest chip, so you can get an idea of how it is done.
Install video installing on the CG2 board
Matrix 1 (Oldest)
The Matrix 1 board looks like the images below. It is the oldest of the controllers and is easy to identify by the blue square board on the top left back of the controller, which sometimes has a metal cage around it also. Sorry for the poor image quality below we will do some new ones shortly.
Solder all red points below, being careful not to short any points like the RB wires to the metal cages.


CG1 / CG2
The CG1 is the most common board currently found. It looks very similar to the CG2 board, only with the black Microsoft chip on the back of the controller being at a 45 degree angle, instead of square on. The install for that is identical to the CG2 board, so we only show the images for the CG2.
Solder all red points below, being careful not to short any points like the RB wires to the metal cages or the sync button to the pins either side of the center.


Matrix 2
The Matrix 2 come out laet 2012 (USA) and early 2013 mainstream most other places. The Arbiter is the only (and patent protected) chip on the market that can work with the Matrix 2 boards.
Solder all red points below, being careful not to short any points like the RB wires to the metal cages.
Important: Make sure you cut this part out of the front shell before installing the chip into a Matrix 2 controller, otherwise it can permanently damage the chip.


CG3
The CG3 is found in special edition controllers like the Halo 4 controllers, and generally looks white, but can be green. The install is the same as the CG2 so you can follow that.
Wired Controller
The Arbiter is the only (and patent protected) chip on the market that can work with the wired boards. Install is hard for the wired controllers and needs a tactile push button switch, some wire, glue and a drill.
Solder all red points below, being careful not to short any points like the RB wires to the metal cages.


PS3 INSTALLATION
The Arbiter 3.5 Elite chips are compatible with most PS3 controllers (from between 2011 models to the latest but one controllers). The models that are compatible are the VX2, VX3, VX3, VX4, VX5, VX6 and Asuka. Those models are written on the circuit board inside the controller so you have to open it up first.
Start by removing the 5 screws from the back of the controller then removing the cover. To see a video of totally dismantling the PS3 controller watch the video below. For the Arbiter install you only need to remove the back and circuit board, not everything else shown in the video.
With the back off, remove the battery by gripping the white clip and shaking/pulling firmly keeping old of the white clip not just pulling at the wire as it can break.

Then remove the single screw holding the board in place using a Philips screwdriver (anything from PH00 to PH1 will be fine)

Now carefully lift the board up (not too far as it is attached by the motors) and rotate it upside down placing it out of the way


Notice the green flexible ribbon at the top right, where there are 20 lines of connectors with a black foam pad underneath - lift the flexible ribbon out (it is attached by slotting over 2 plastic tabs) and remove the original black foam.
Now peal off the white cover from the foam supplied with the chip, and stick it to the back side of the flexible ribbon covering the connectors. If you struggle on positioning it, you can place it into the hole the original one came from with sticky side up then place the ribbon back into place so it sticks too it.

Notice the foam covers the 20 pins. It is important as those need to be "pressed" against the chip firmly to work.

Now connect the battery cable that come with the kit to the top battery connector on the chip. Connect it gently as it is easy to break this part of the board.

Place the chip inside the controller, locating the chip over the 2 holes that the ribbon cable locates over.

Move the 2 red wires out of the way and place the controller circuit board back into place, making sure the Arbiter chip stays in place, and then screw the single screw back in to keep the circuit board in place.

Now solder the 2 wires (or use conductive glue if you don't want to solder) to the pins shown in the image below. If your board is different than below, don't worry, check out the images below and look for your board.

If your board is different, solder the 2 wires to the locations shown below on the board that matches yours
VX2.2

VX2.5

VX3

VX4

VX5 (and VX6 are the same points)

Asuka

Now place the battery back in place, making sure the 2 wires are not caught underneath it, and gently connect the battery to the Arbiter bottom power connector.

Now put the controller back together and away you go!
NOTE: For the latest VX7 boards the wired version of our chip should work, so we are working on testing that and releasing it asap.

ARBITER 3.5 USAGE VIDEOS
To better understand all the features of the Arbiter 3.5 Elite watch our usage videos. There is a lot to explain so they are broken down into several videos, but they are worth watching
Basic Usage
Selecting Chip Modes
User Programming, Adjusting Timing, Quick Scoping
Features - Auto Run, Auto Spot, Stand, Tactical Remapping etc...
ARBITER 3.5 INSTRUCTION MANUALS
If you have lost your manual or just want a digital copy, find them below.
Download Xbox 360 Arbiter 3.5 Instruction ManualDownload PS3 Arbiter 3.5 Instruction Manual


